Medisoft Version 22, the Most Popular Choice for Medical Billing Software
Medisoft uses simple icons, which highlight the most common tasks performed on a daily basis, allowing you to use Medisoft for your day-to-day Medical Billing and Practice Management tasks. You’ll never need intensive training to utilize the power of the product.
That’s why most medical billing schools choose Medisoft for their training software – and that means you can easily find trained staff.
Medisoft Version 22
What’s New With Medisoft Version 22?
Online appointment scheduling:
allows patients to make their own appointments before, after or during business hours. With this new feature the practice will allow an open spot to be booked online. When a patient schedules a slot, that slot automatically locks within the patient accounting system to avoid overbooking.
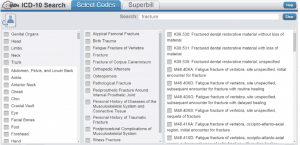
The new and improved ICD-10 search tool:
This an online look up library thats real time update for the active codes allows your practice to search a code by clinical or billing descriptions, abbreviations, codes and even anatomical diagrams!
The integrated appointment reminder system:
allows you to remind your patients about their appointment by text, phone or secure email. When the patient confirms their appointment, Medisoft is updated to reflect the appointment status. The Autoremind portal also lets you work your patient recall process more efficiently.
Practice Cleanup Utility
Regardless of whether or not you inherited an accounting mess from another biller or the billing
history has been neglected, Medisoft v22 is equipped with an accounting clean tool that will allow you to purge all transactions. Balances can be written off regardless of it is an open balance for a patient or insurance. This allows you to be up to date on your patient collections, sending statements and your accounts receivable will be more manageable.
AR Tracker
The AR Tracker, new to version 22, ties together AR management into one cohesive workflow and adds advanced filtering to track and collect insurance and patient balances.
New Permissions
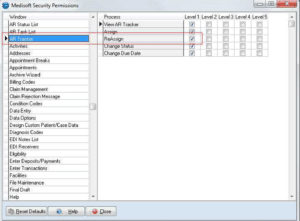
There is a new security permission on the Medisoft Security Permissions screen. AR Tracker. Use this to set the level of security on the AR Tracker feature. The default level is 1. Two processes are available:
View–allows you to view the AR Tracker
Reassign–allows you to assign/reassign claims/tasks to different users
New Menu Option
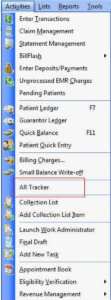
There is a new option on the Activities menu: A/R Tracker. Click this option to open the AR Tracker screen.
New AR Tracker Screen
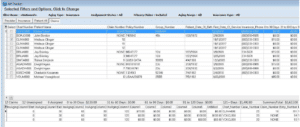
This is the main screen for the AR Tracker feature. It displays the filter settings and the grid shows you the information that meets the filter requirements.
When you select AR Tracker for the first time, it displays the default filter selections of All. In addition, you can save filter selections and settings on the AR Tracker Filters screen.
Sorting Grid Columns
You can sort columns by clicking the column header. An icon will appear, showing you which column the data is sorted by and whether the sorting is ascending or descending.
Changing grid columns
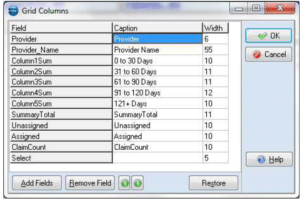
You can change which columns appear on the grid. To do so, click the black dot at the left of the column headers. This will open the Grid Columns screen.
Filter Detail
Below the filter link is the filter detail, which shows you how the grid information has been filtered.
Drilling down
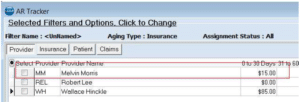
You can drill down to several levels using the four tabs in the lower top section.
The level will appear indented after you select it.
Double-clicking a grid item will change the level. The change will appear in change in which tab is indented. The benefit of double-clicking is that new level will show you only the items that pertain to the line item you double-clicked.
For instance, double-clicking on Melvin Morris in the image below will show you Insurance level for only Melvin Morris.
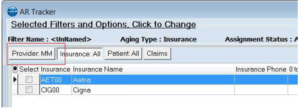
Once you double-click, you will see the image below. Note that the insurance is only for Melvin Morris and the Provider Level filter link shows you the provider’s code, indicating the list is filtered by that provider.
Claims drill-down
When you select the Claims tab and select a line item, the detail for the line item will appear in a second grid below.
Viewing transactions not assigned to claims
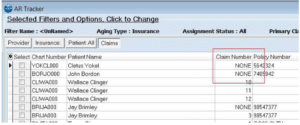
If you want the AR Tracker to show you transactions entered that have not yet been added to a claim, select the No Claim check box on the AR Tracker Filters screen.
These claims will then appear in the grid and the Claim Number will be NONE.
AR Tracker Filters screen
Use this screen to set up and save filtering options for your AR tracking.
To open this screen, click the link in the top section of the AR Tracker screen.
New AR Status Codes
You can create tracker Status Codes that you can assign to claims and statements.
New menu option
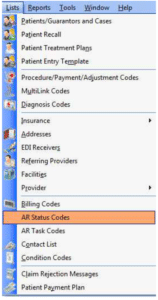
There is a new option on the Lists menu: AR Status Codes. Click this option to open the AR Status Code List screen, which you can use to create, edit, and delete status codes for AR tracking.
New AR Tracker Status Code List screen
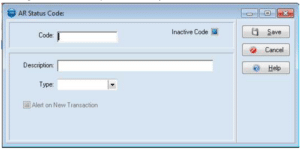
This screen opens when you select the AR Status Codes option from the Lists menu. Use it to create, edit, and delete tracker statuses that you can assign to claims and statements
New AR Task Codes
You can create tracker task codes that you can assign to claims and statements.
New menu option
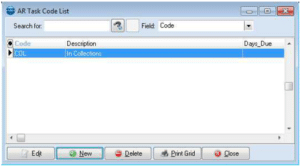
There is a new option on the Lists menu: AR Task Codes. Click this option to open the AR Task Code List screen, which you can use to create, edit, and delete tasks for AR tracking.
New AR Task Code List screen
This screen opens when you select the AR Task Codes option from the Lists menu. Use it to create, edit, and delete tracker tasks that you can assign to claims and statements.
In addition, you can print the list of AR Task Codes and mark them Inactive if you no longer need them.
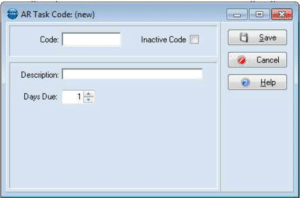
Selecting the New button will open a screen that you can use to create a new status.
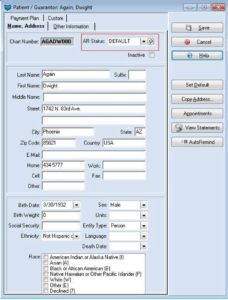
Updated Patient/Guarantor screen – Name, Address tab
New field
There is a new field on the Name, Address tab: AR Status. This field shows the status of the patient for AR purposes. This field is set on the Assign AR Patient Status screen or you can add or change it here.
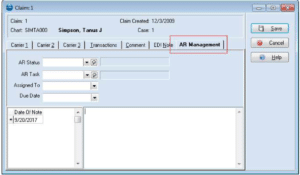
Updated Claims Management
New tab
There is a new AR Management tab in Claims Management. Use this tab to assign a status, task and user or Note, to a claim.
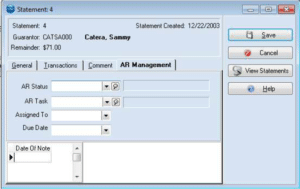
Updated Statement Management
Use this tab to assign a status, task and user or Note, to a statement.
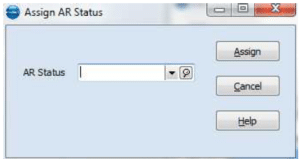
New Assign AR Status screen
Use this screen to assign either a patient AR status, claim AR status, or Statement AR status to a patient, claim, or statement. When you assign a patient AR status, it will appear on the Patient’s record at the top of
the Name, Address tab. When you assign a claim AR status, it will appear on the AR Management tab of the claim. When you assign a statement AR Status, it will appear on the AR Management tab in Statement Management.
The AR Status field on this screen will filter automatically based on your selection from the right-click menu of AR Tracker, either
- Assign Patient AR Status
- Assign Claim AR Status
- Assign Statement AR Status.
Select the status from the drop-down and click Assign. The claim, statement, or patient record will be updated.
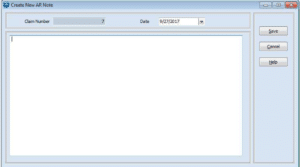
New Create New AR Note screen
Use this screen to create notes for a claim. This screen will open when you select Add AR Note to Claim from the right-click menu on the AR Tracker screen while you have selected a claim on the Claims tab.
Enter your note and click Save. The note will appear in the notes section of the AR Management tab of Claim Management.
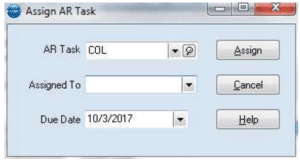
New Assign AR Task screen
When you select Assign Task from the right-click menu on the AR Tracker screen, the new Assign AR Task screen appears. Use this screen to assign a selected task to an individual. You can also set a date when the user must complete this task.
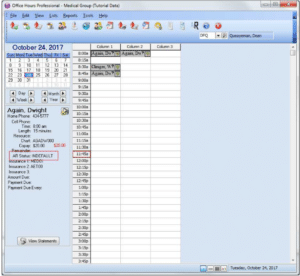
New Office Hours AR Status
You can now see the patient’s AR Status in Office Hours. It appears in the left column under the calendar.
New Transaction Entry AR Status pop-up
When you have assigned an AR Status to a patient that has Display on New Transaction selected, you will see a pop-up message when you close or save the transaction.
CPT Code Search
There is a new CPT Code search feature that allows you to search for CPT/Procedure codes and add them to your practice.
Note: This is an add-on feature to Medisoft 22 and will work only for Medisoft 22. For information on purchasing CPT Code Search, contact your Value-Added Reseller. Once you purchase CPT Code Search, you must register it to activate it.
In addition, Internet is required on your server to use CPT Code search. Client workstations do not need Internet access if the server computer has Internet access.
If you are registered, Medisoft will call CPT Code Search database the first time you access it two days before the end of the month and pull all updated CPT information into the system. This will give you two days to add the codes to the database before the codes are billable.
Registration for a code year will change versions on the first day of the calendar year. At that time you will need to add your serial number on the registration screen to reactivate the CPT search window.
With this feature, you can add either
- A single code–Find CPT button on the Procedure/Payment/Adjustment Code screen
- Multiple codes–Add CPT Codes button on the Procedure/Payment/Adjustment Code List screen
Removed Encoder Pro
Encoder Pro is no longer available with this release.
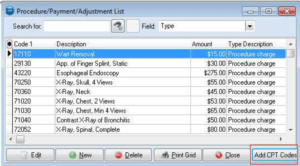
Updated Procedure/Payment/Adjustment List screen
New button
There is a new button on this screen: Add CPT Codes. Click this button to open the CPT Codes Search screen, which you can use to add multiple codes simultaneously.
Updated Procedure/Payment/Adjustment screen (New/Edit)
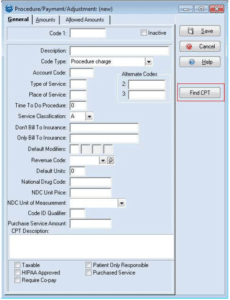
New Find CPT button
There is a new Find CPT button on this screen. Click this button to open the CPT Code Search screen, on which you can add a single CPT code.
After you select a code, the information will appear on the Procedure/Payment/Adjustment screen.
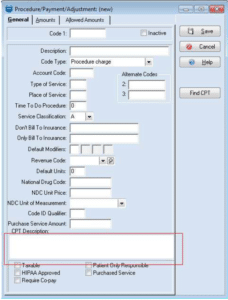
New CPT Description field
This new field shows you the description of a CPT code added using the CPT Code Search feature.
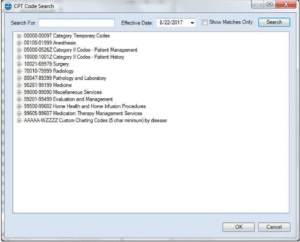
New CPT Code Search screen (single code search)
Use this screen to search for a CPT/Procedure code and add it to your practice.
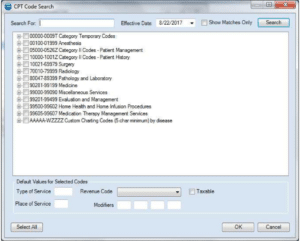
New CPT Code Search screen (multiple code search)
Use this screen to add more than one CPT code to your code set at once.
Procedures
Adding a new code on the Procedure/Payment/Adjustment Codes screen
To add a new code on the Procedure/Payment/Adjustment Codes screen
1. On the Lists menu, select Procedure/Payment/Adjustment Codes. The Procedure/Payment/Adjustment Codes screen opens.
2. Click the New button.
3. Click the Find CPT button. The CPT Code Search screen opens.
4. Enter the code you are searching for in the Search For field.
5. Click the Search button. The code will appear in the section below, with the code tree opening to show you the code and its description.
6. Highlight the code and click the OK button. The code will appear in the Procedure/Payment/Adjustment (new) screen.
Adding multiple codes from the Procedure/Payment/Adjustment List screen
To add multiple codes at once:
1. On the Lists menu, select Procedure/Payment/Adjustment Codes. The Procedure/Payment/Adjustment Codes screen opens.
2. Click the Add CPT Codes button. The CPT Code Search screen opens.
3. Enter a code to search for or use the code tree in the grid to find a group of codes to add.
4. Select the check boxes to the left of the codes you want to add.
5. Enter additional information for Type of Service, Place of Service, Modifiers, and so on as necessary.
6. Click the OK button. The codes will appear in the Procedure/Payment/Adjustment List screen.
Medical History
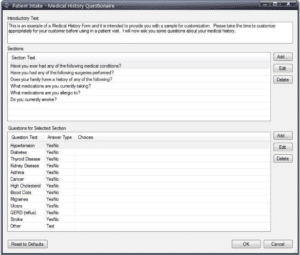
You can now edit the Medical History Questionnaire form from within Medisoft.
New Option
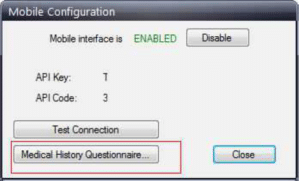
There is a new option: Medical History Questionnaire. To open this option, select Mobile from the Tools> Services menu. Then, click the Medical History Questionnaire button.
Medical History Questionnaire
You can revise and modify the Medical History Questionnaire that patients will see when they come the forms during Patient Intake using a mobile device.
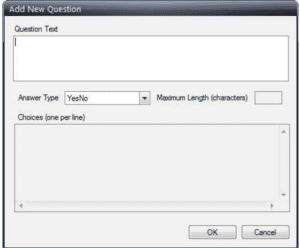
New Add New Question screen
Use this screen to add new questions to a selected section of your medical history questionnaire.
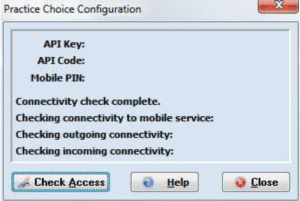
Practice Choice Configuration
Renamed Option
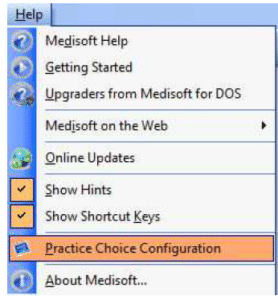
The option “Mobile” on the Help menu has been renamed to Practice Choice Configuration. Previously, this option was used to create an API Key and API Code to interface Medisoft Mobile with your practice. The option to create the Key and Code is now found on the Tools menu, under Services > Mobile Configuration and uses the Mobile 3.0 Service. Now, the Practice Choice Configuration option is only for users who want to interface Medisoft with Practice Choice, using the older Mobile 2.x service. The API Key and Code are used by eMDs implementation consultants to link Medisoft with Practice Choice.
In addition, the screen that opens when you click this option has changed name.
For feature list of other versions visit:
Looking for more information? We can help. Contact our consultants. Call 800-955-0321 or click here
Need more info?
Call us at 800-955-0321
Call 800-955-0321 or Click below
Schedule Live Demo
Let our experts show you our solutions

